
In previous post I have discussed how to make passive income from blogging. In this post I going to tell you How To Create A Free Blog On The Blogspot Blogging Platform.
If you have not any knowledge about blogging, you can my post on Blogging.
Having a blog is a great thing because you can share anything you want and also you can earn a passive income from your blog.
Many new bloggers who want to start blogging don’t want to spend money to create a blog. There are many blogging platforms which offer users to create free blogs. If you are one looking for a simple blog and don’t want to invest in hosting and domain then my suggestion would be to start blogging with WordPress.com or Blogger.com. These are two most popular blogging platform.
When you get some blogging experience in Blogger.com then you can move your blog to self-hosted WordPress blog. I am saying this because Blogspot platform allows you to create a free blog, but it has many limitations.
In this post I will tell you about making free blog with blogger.com and in the next post I will talk about free blog making with WordPress.com.
This post is dedicated to the “beginners” who are in beginning phase of learning.
Lets first start with the gaining some knowledge about Blogspot?
BlogSpot is a blogging platform that is owned by Google. It offers you an opportunity to start a blog, and all your images that you upload on your blog will be hosted by Picasa (It is a website of google company).
How To Create A Free Blog On The BlogSpot Blogging Platform?
Contents
show
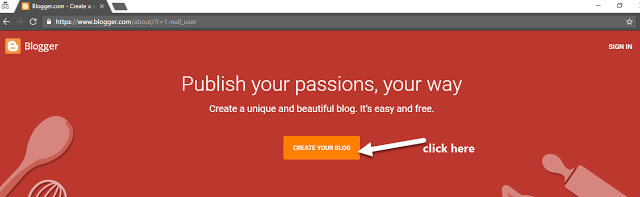
Step-1: Go to blogger.com. Now click on Create your Blog button.

Step-2: Now a login page will open. Login with your google account if you have one. It is your gmail account. If you do not have google account then click on create an account given at the bottom.

Step-3: After successful login, you will see a popup window. Now enter the title(name) of the blog that you want to start.

Step-4: Next enter the blog URL name in the Address section. It is mainly blog name followed by blogspot.com. In case you enter a name and it says name not available then you can try unique name by entering several names.
Step-5: After entering your Address name, choose your blog template from the list. If you don’t like the template; Don’t worry you can change it later with any third party templates which are available free.
Step-6: After filling all details, now click on Create blog! button. Congratulations your blog has been created. Now a dashboard will open where you can start posting your ideas, knowledge, experience,etc.

The dashboard has many tabs like posts, stats, comments, earnings, campaigns, pages, layout, template, and settings. Using these tabs you can customize your blog. You can see number of visitors using stats tab. You can also monetize your blog using earnings tabs which is connected with adsense account. I will discuss in detail each tabs and their working in next post.
How to Create a post?
In the dashboard you will see New post button. Click on that and a window will open which is very much similar to your windows office. Here you can enter your title of the post and write an article inside the compose section as shown in figure. Once you have written, press Publish button to publish your post. You can also save draft by only clicking Save button. You can also see preview of your post by clicking on preview button.

After posting you will see a window like this.

Click on View Blog to see your blog. A window will open into new tab. Your blog should be like this as shown in image below. Now tell your friends about your blog by sharing this URL.

I hope to learnt how to make free blog with blogspot platform. You can do a lot of things to customize your blog which I will cover in next post. If you like this post please share with your friends.
Thanks for the priceless information .